this tutorial by : Mohammad Jeprie

Preliminary Step: Research
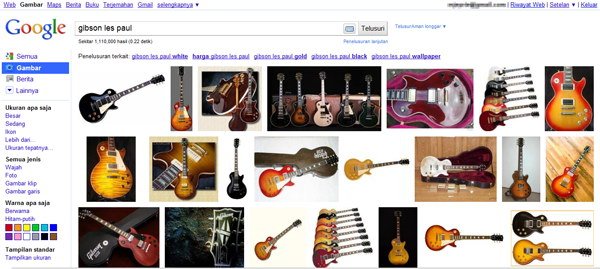
As always, we need to search for image references to get a good idea of what we are going to draw. The electric guitar we are going to draw is inspired by the legendary Gibson Les Paul guitar. You can find photos of it in Google Images.
Look at some reference images to familiarize yourself with the parts of the guitar.
Step 1: Draw the Guitar’s Body Shape
Create a new Photoshop document with a canvas size of 1000×1500px. A big canvas will help us with the drawing of the details of the electric guitar easier.
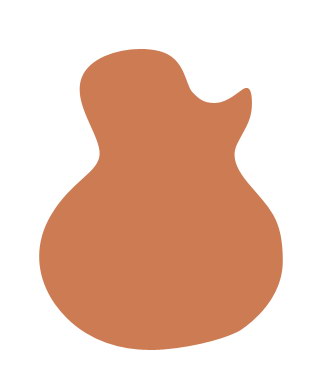
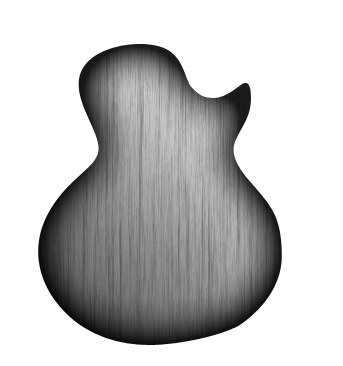
Let’s start with the basic shape. Use the Pen Tool (P) to create the body shape of the guitar using a brownish-salmon color (#cd7b53) as the fill color.

Duplicate the path and move it 15px to the left. This will represent the left side of the guitar.
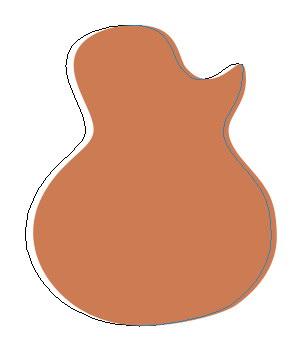
Fill the duplicate path with a brown color (#3d1e0a) that is darker than the first color. Place this shape behind the original one. The combination of these two shapes will help develop the 3D appearance of the guitar.
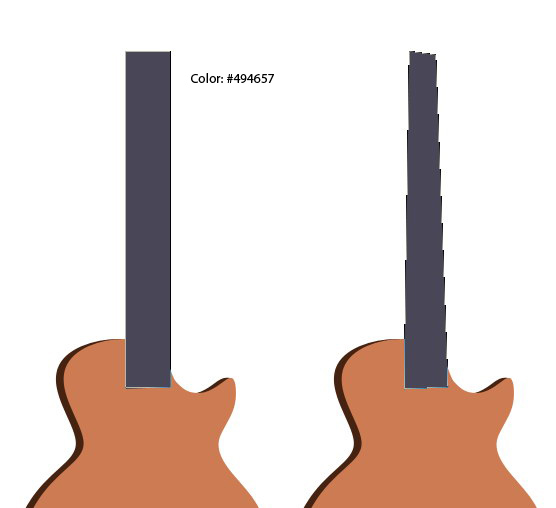
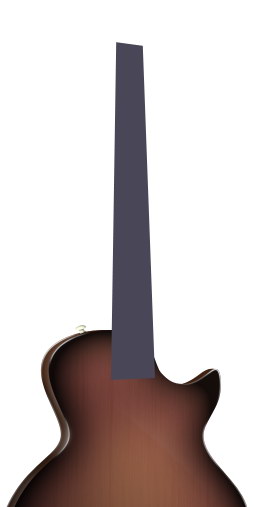
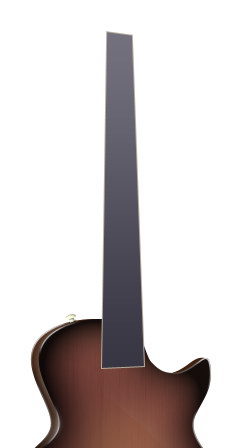
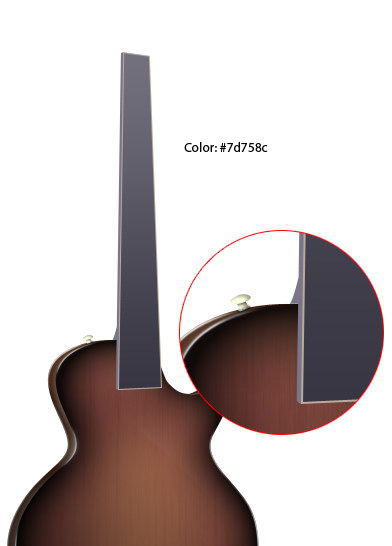
Step 2: Draw the Guitar’s Neck
Create a rectangle shape for the guitar’s neck. Remember to modify its perspective until it matches up with the body. You can use Edit > Transform > Skew or modify its anchor points individually.
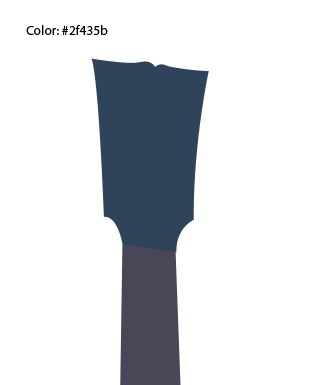
Step 3: Draw the Headstock
On top of the neck, use the Pen Tool (P) to draw the guitar’s headstock.
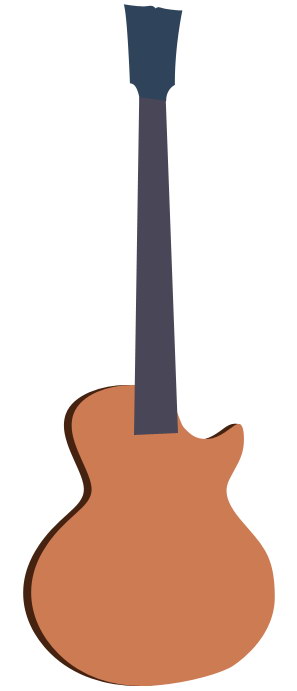
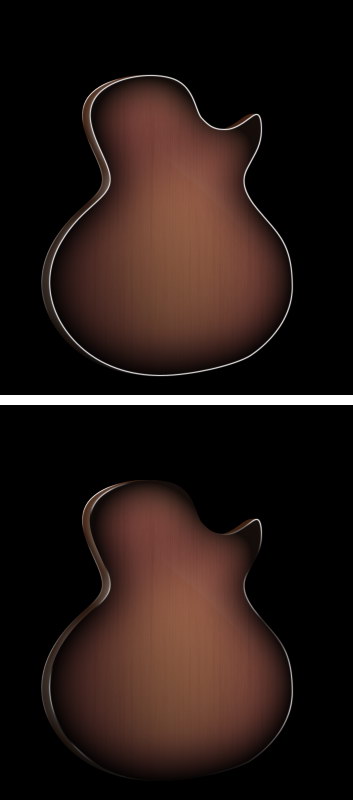
Below you will see the basic shapes of our guitar.
Next, we will be modifying the guitar parts and adding in the guitar’s details.
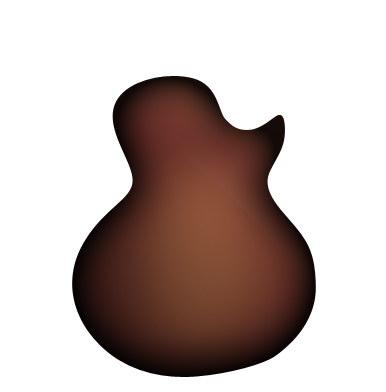
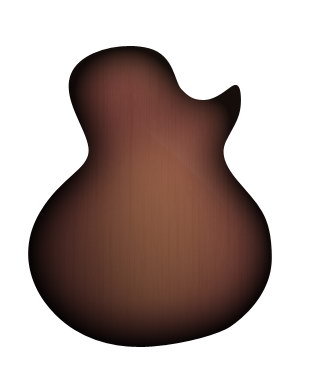
Step 4: Color the Surface of the Guitar’s Body
Temporarily hide all the shapes except the guitar’s body so that we can concentrate on it.
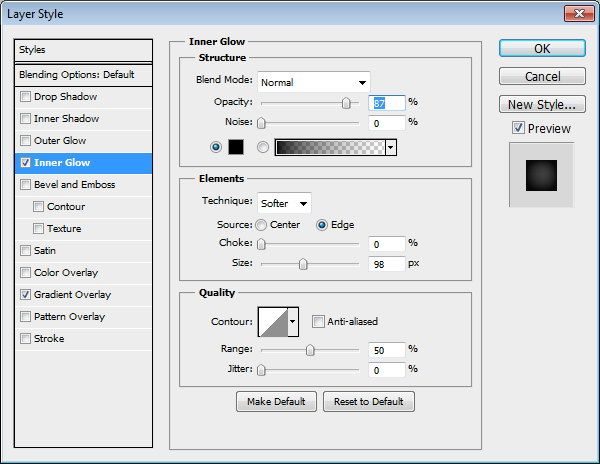
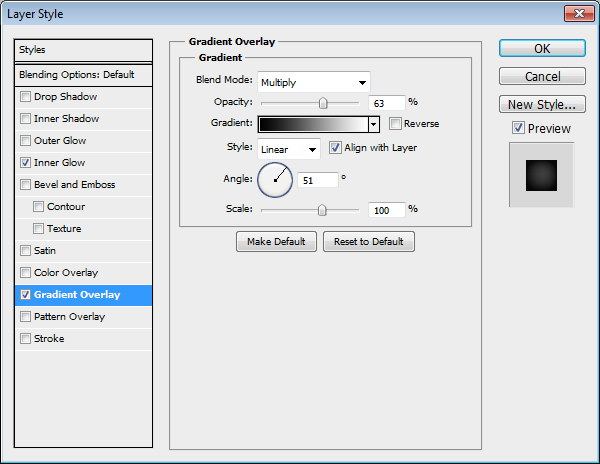
Give the body an Inner Glow layer effect (to add a dark line along the edge) and a Gradient Overlay layer effect (to spice up our otherwise boring, flat color).
Inner Glow
Gradient Overlay
Here’s the result of our layer style:

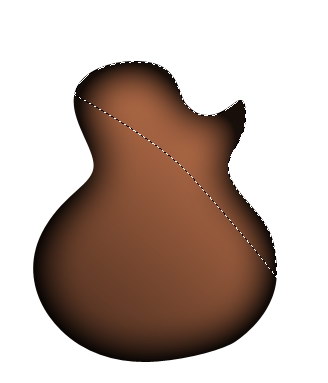
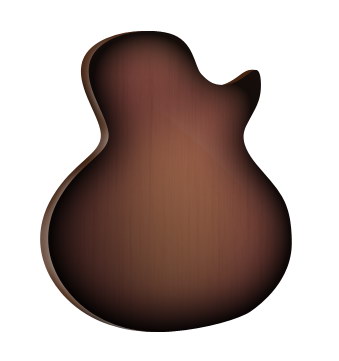
Create a path using the Pen Tool that cuts across the top half of the guitar’s body. Hit Ctrl/Cmd + Enter to convert the path to a selection.
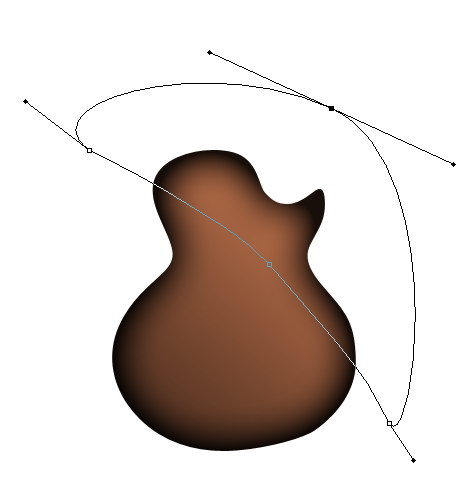
Hold down Ctrl/Cmd + Alt/Option and then click on the body’s thumbnail in the Layers Panel to intersect the selection with the body shape.
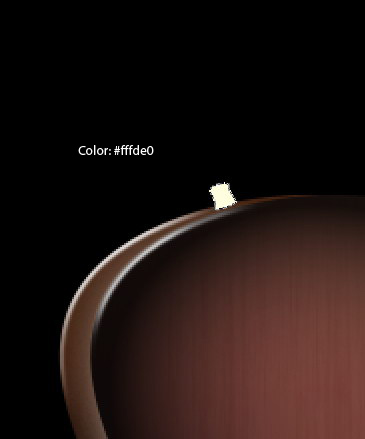
Set your Foreground color to white (#ffffff) and then use the Brush Tool (B) to paint inside the selection.
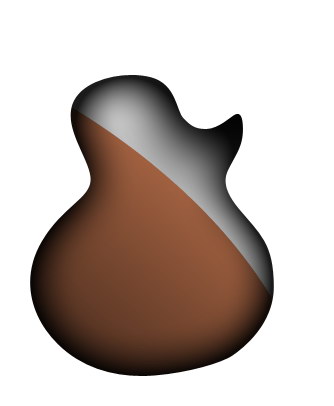
Reduce the layer’s Opacity to 10%.

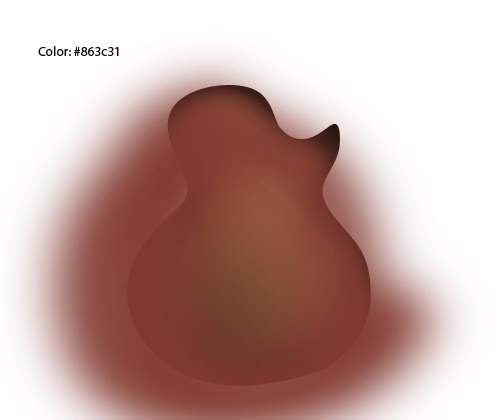
Create a new layer on top of the guitar. Change the Foreground color to a rosewood red (#863c31) and then use the Brush Tool to paint along the edge with a big, soft brush tip.
Go to Layer > Create Clipping Mask (Ctrl/Cmd + Alt/Option + G) to convert the layer to a clipping mask. This way, everything we have painted will only show up inside the body of the guitar.
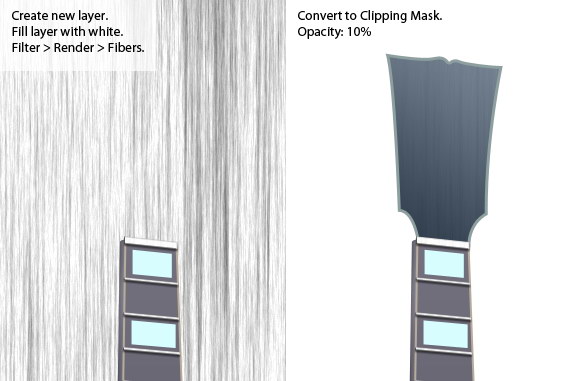
Step 5: Give the Body’s Surface a Wood Grain
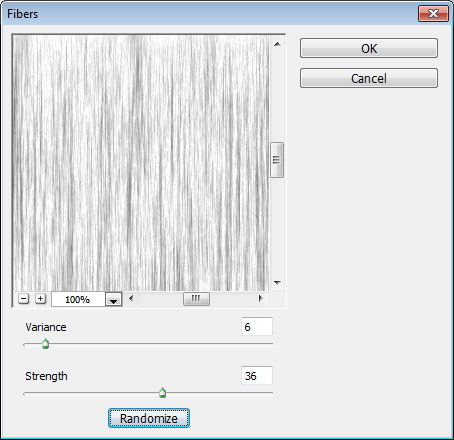
Create new layer on top of the body and fill it with white by going to Edit > Fill (Shift + F5). Reset the Foreground and Background color to black and white by pressing D. Go to Filter > Render > Fibers. This Photoshop filter will give us a nice wood grain surface texture.
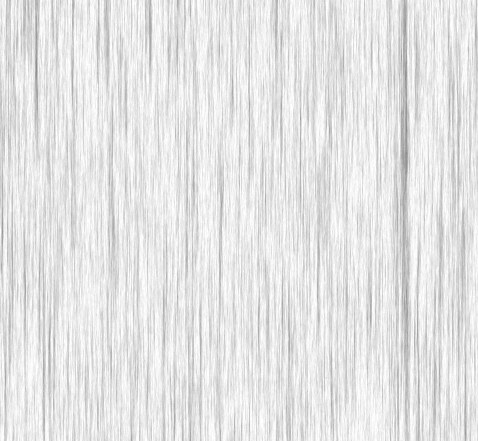
Convert the wood grain layer to a clipping mask (Ctrl/Cmd + Alt/Option + G).
Reduce the wood grain layer’s Opacity to 10%.
Step 6: Add Surface Details to the Side of the Guitar’s Body
Turn on the visibility of the layer containing the left side of the body.

Create a new layer above it and convert this new layer into a clipping mask (Ctrl/Cmd + Alt/Option + G). Switch your Foreground color to white (#ffffff). Use the Brush Tool (B) to paint white on the clipping mask layer to create some highlights on the side of the body and to strengthen the 3D illusion of the guitar.

If I temporarily hide the guitar body layer, you can see the real brush strokes below:
Step 7: Adding More Highlights
Paint some more highlights on other parts of the guitar’s body.
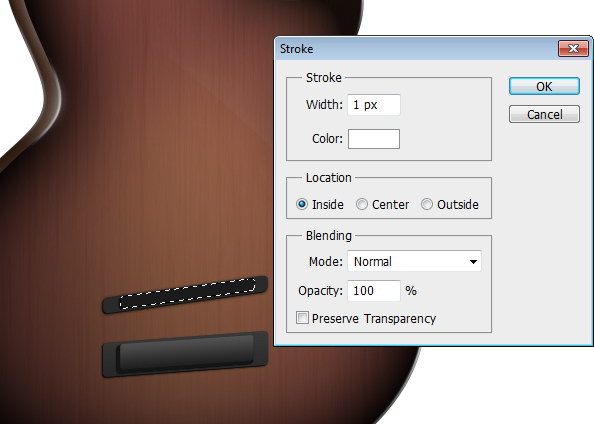
Let’s use another highlighting technique. This will produce sharper highlights. Ctrl-click/Cmd-click on the side body layer’s thumbnail in the Layers Panel to load a selection around the shape.
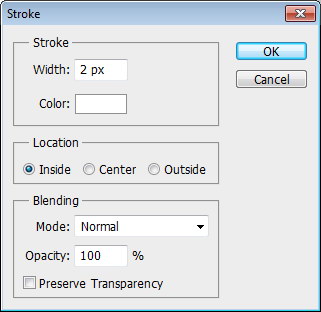
Switch to the Rectangular Marquee Tool (M), right-click/Command-click inside the selection and then choose Stroke from the menu that appears. In the Stroke dialog window, choose white (#ffffff) for Color and set Location to Inside.
It’s hard to see this white highlight against a white background, so, let’s temporarily change the background color to black.
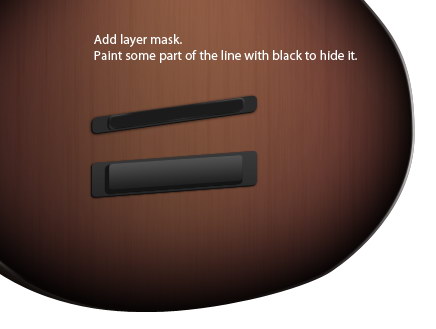
Next, press the Add layer mask icon at the bottom of the Layers Panel, and on the layer mask that is created, paint away parts of the white highlight line with black.

You may notice that after the layer masking that we now have too much light on the lower portion of the body.

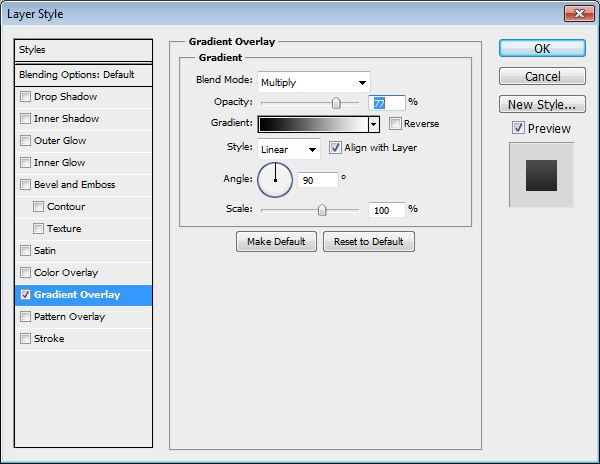
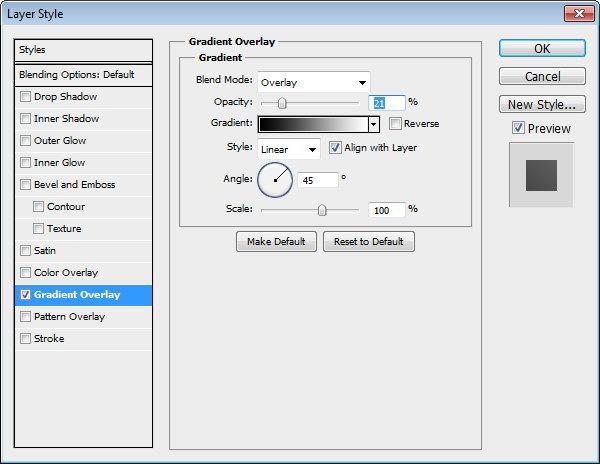
To fix that, we can darken it by adding a Gradient Overlay layer effect. Set the Blend Mode of the Gradient Overlay layer effect to Multiply.
Here’s where we’re at now:

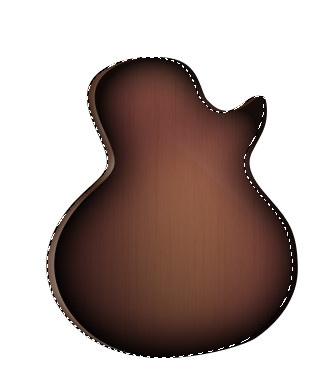
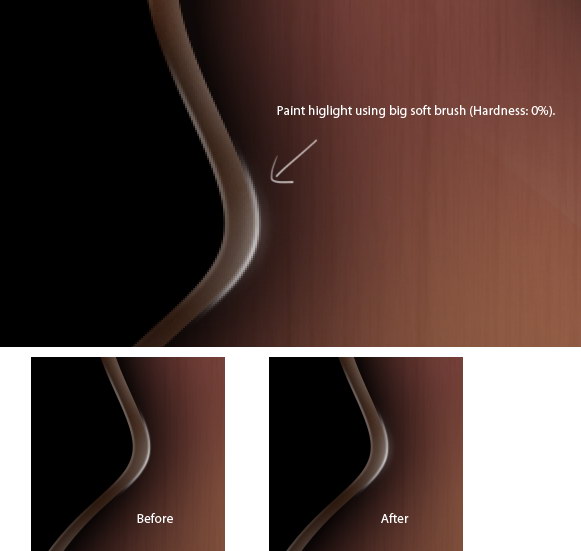
Let’s draw an even sharper highlight, but this time onto the body face. Load a selection around the guitar’s body face.

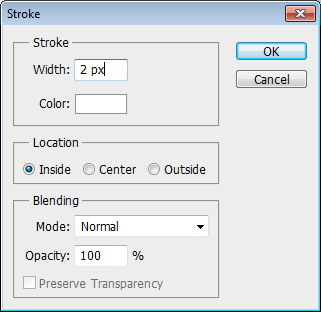
Choose Edit > Stroke, set Width to 2px, Color to white, and Location to Inside.
Just like before, add a layer mask and then, on the new layer mask, paint away some of the white highlighting stroke with black. To help us see the highlight clearly, fill the background temporarily with black.
Zoom in very closely to the highlight. Create a new layer and paint white using a big, soft brush. This will add a nice glow onto the highlight.
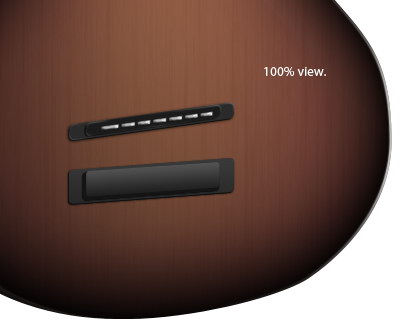
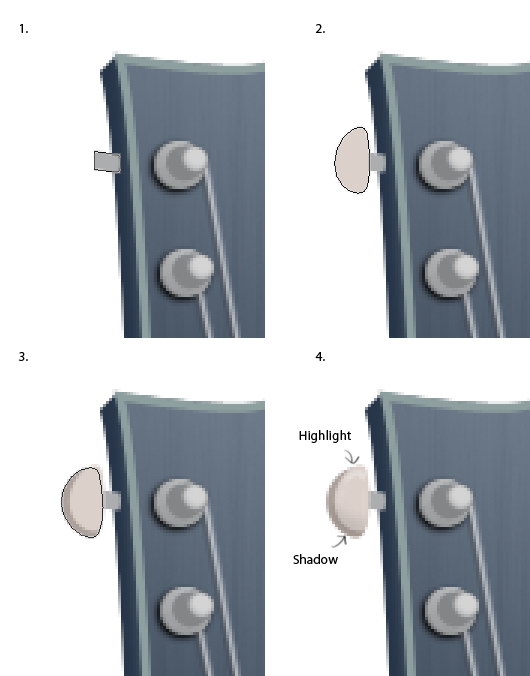
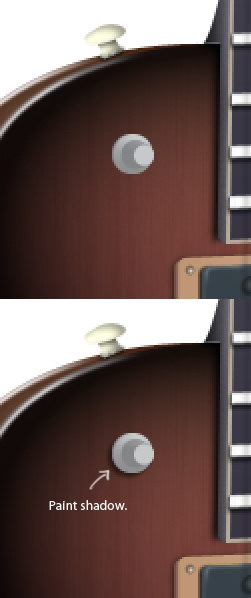
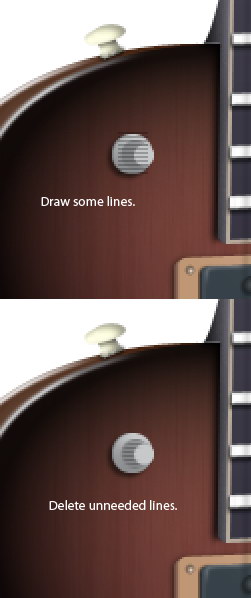
Step 8: Draw the Screw for the Guitar Strap
Electric guitars typically have screws (called a strap holder post) so that guitarists can attach a guitar strap to it. Let’s draw that now.
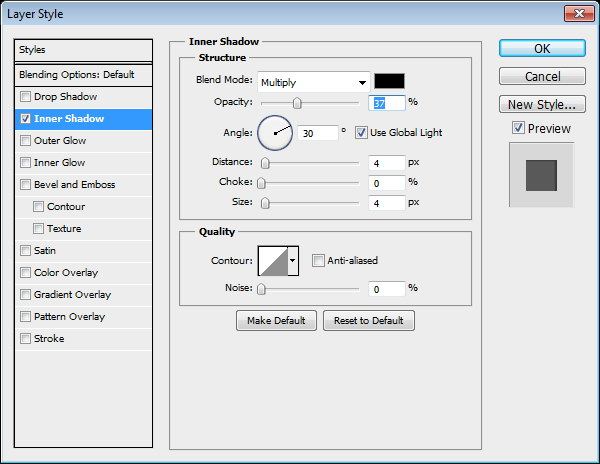
Give the screw an Inner Shadow layer effect.
This screw is very small so we need to zoom into it in order to work on its details.
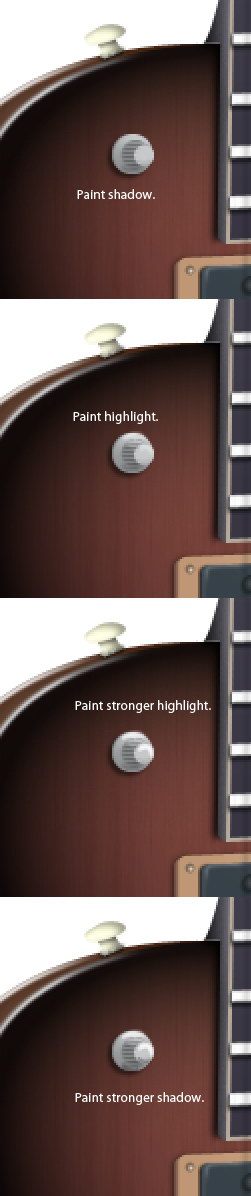
Create a new layer and paint some shadows and highlights on the screw to help define its shape. Then draw the top part of the screw. You can see my drawing progression below.
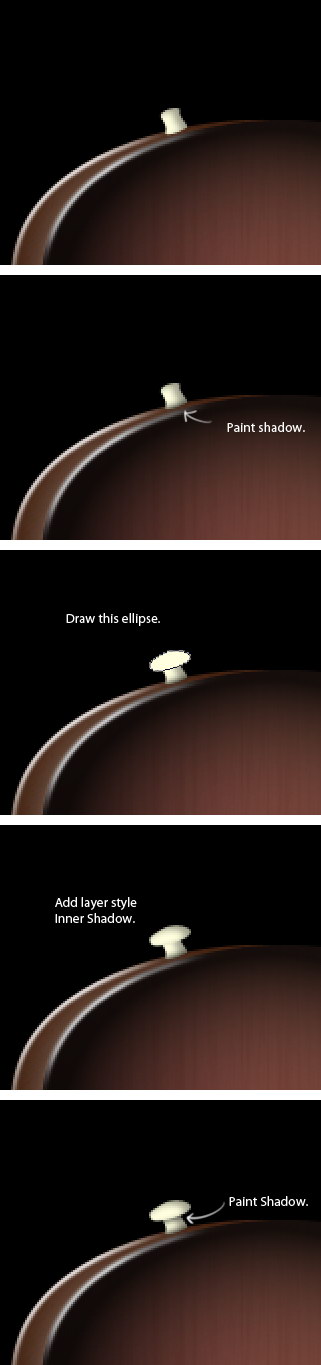
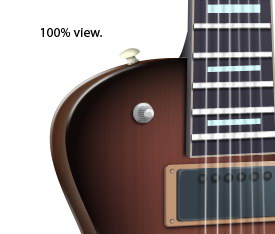
After working with small details, it’s always a good practice to constantly check it in 100% magnification (press Ctrl/Cmd + 1). You need to make sure that the details look good.
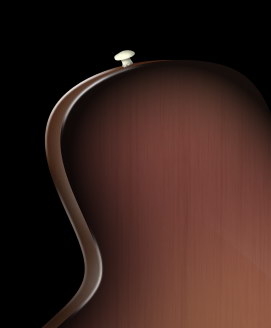
Change the background color to white again. This is where we are with our electric guitar drawing so far:

Step 9: Shaping and Shading the Guitar’s Neck
Toggle the visibility of the guitar neck layer back on.
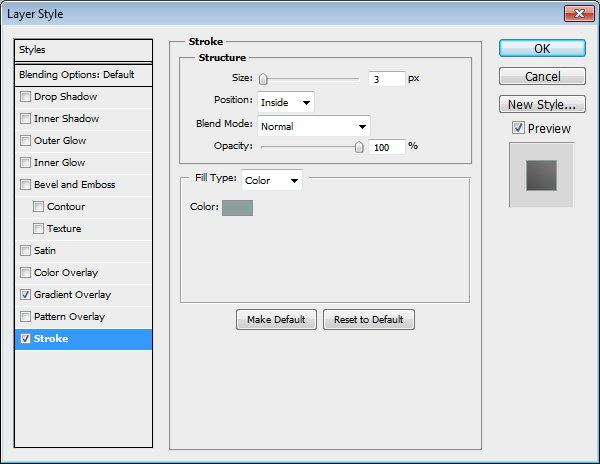
Give the neck layer a Gradient Overlay layer effect and a Stroke layer effect.
Gradient Overlay

Stroke

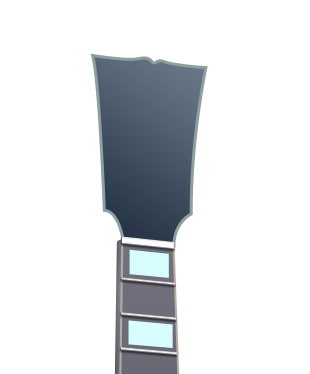
This is the result of the layer style:
Draw a shape for the back part of the neck. Give the lower part of the neck’s back shape a curve (see the image below for reference).
Create a new layer below the neck layers and manually paint its shadows.

Step 10: Add Guitar Frets
Draw some white rectangles on the guitar neck to represent its frets. Make sure to match the perspective of the frets to the neck’s face.
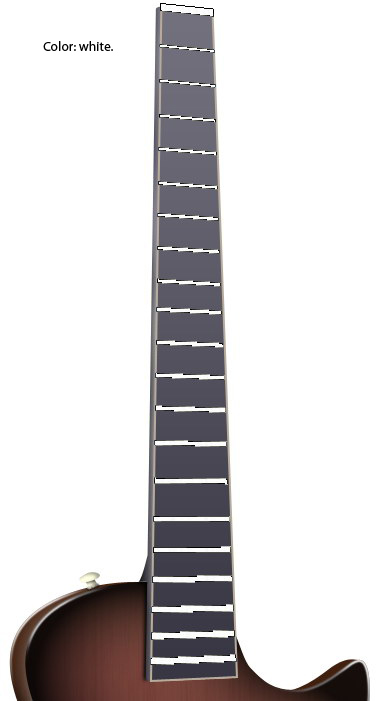
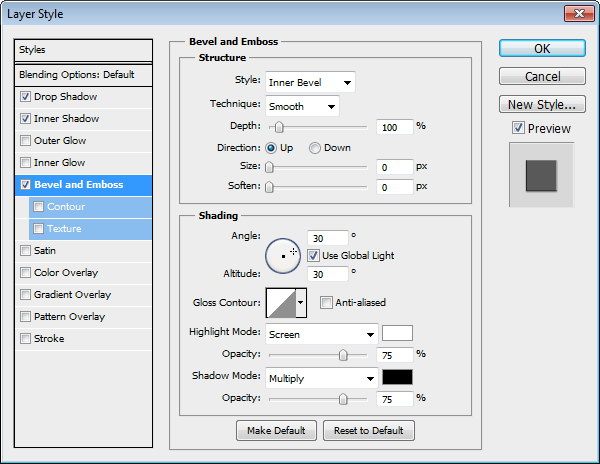
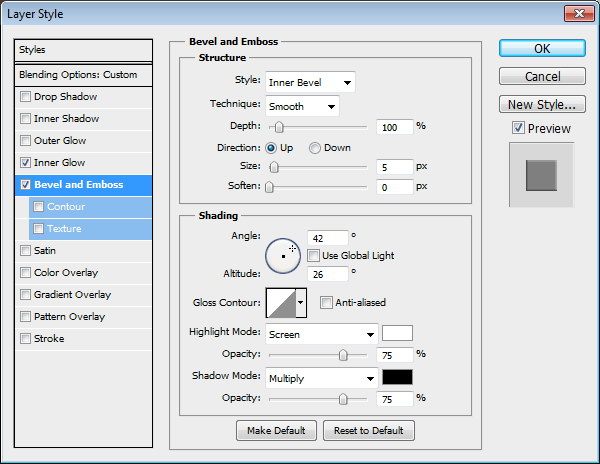
To make the frets look like real frets, we will use a Drop Shadow, Inner Shadow, and Bevel and Emboss layer effects.
Drop Shadow

Inner Shadow

Bevel and Emboss
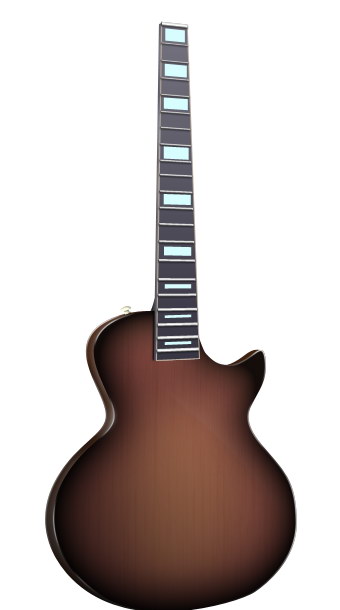
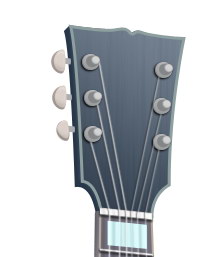
Step 11: Add Position Markers on the Neck
The fretboard of guitars usually has some position markers to help guitarists visualize what frets they’re pressing down on. Let’s draw these now.

Here is our work so far:
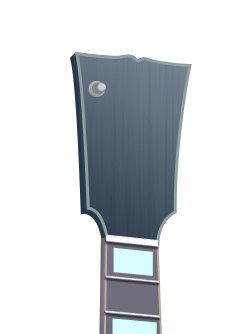
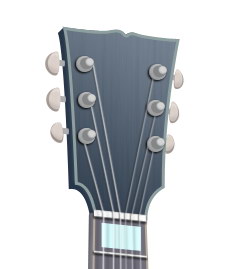
Step 12: Add Some Surface Detailing to the Headstock
Toggle the visibility of the guitar’s headstock layer back on.
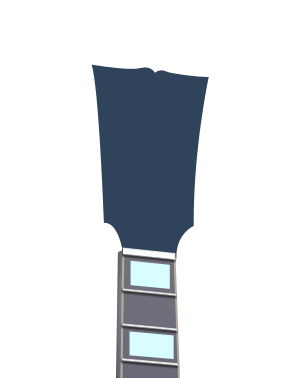
Give this layer a Gradient Overlay and a Stroke. As you may have surmised by now, I will typically use a Gradient Overlay to avoid flat, solid colors because in reality, guitars won’t have flat colors.
Gradient Overlay

Stroke
Here’s the headstock of our guitar with the layer style applied:
Let us give the surface of the headstock a wood grain as well. Create a new layer on top of the headstock. Fill the new layer with white. Hit D to reset your Foreground color and Background color to default (black and white, respectively). Choose Filter > Render > Fibers. Convert the layer to a clipping mask (Ctrl/Cmd + Alt/Option + G). Reduce the layer’s Opacity to 10%.
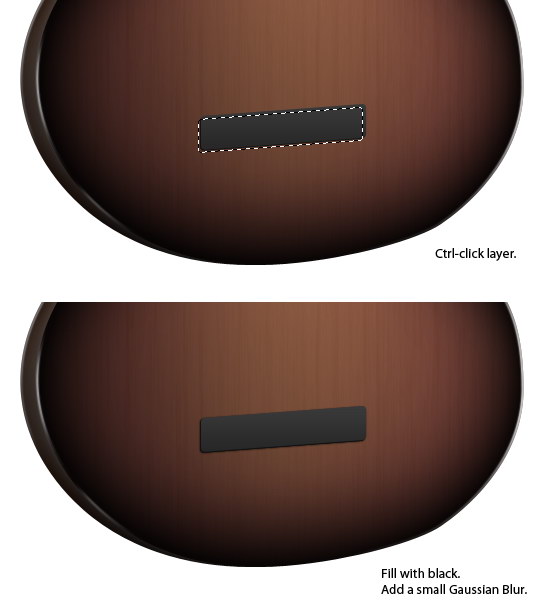
Step 13: Create the Electric Guitar’s Bridge
The bridge of a guitar holds the guitar strings in place (along with the headstock). Create a rounded rectangle shape then use Edit > Transform > Skew to match the perspective of the guitar’s body.

Give the bridge layer a Gradient Overlay.

Load a selection around the bridge. Move the selection 2px down and 2px to the left by pressing your Down Arrow key and Left Arrow key twice for each direction. Create a new layer below the bridge layer and then fill the selection with black. This will add to our 3D illusion.

Make sure that you still have a selection around the black shape we just created (if not, go to Select > Reselect). Create a new layer below it and then fill the new layer with black. Soften the new shape by using the Gaussian Blur filter (Filter > Blur > Gaussian Blur) with Radius set at 0.5px. This will add a soft, subtle shadow behind the bridge.
Step 14: Draw the Saddle of the Guitar
We will draw the saddle that sits on top of the bridge; its purpose is to prop up the guitar strings and make sure they are taut.
Create a smaller rounded rectangle on top of the bridge and adjust it as necessary to match the guitar’s perspective.
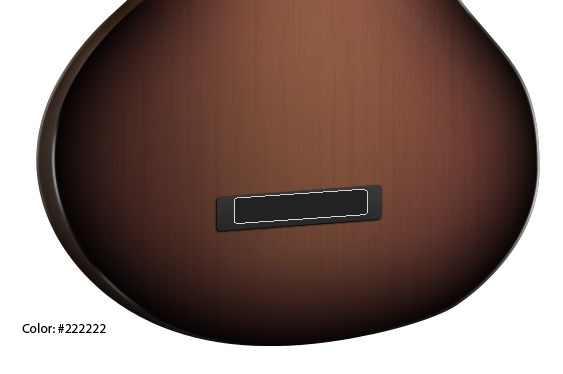
Give the saddle a Gradient Overlay.

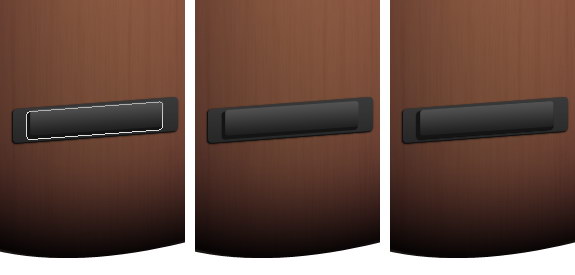
Repeat the previous process that we used on the bridge to give the saddle a 3D look. A quick refresher: Duplicate the shape, nudge the duplicate 2px down and 2px to the left, load a selection around it, fill the selection with black, then use the Gaussian Blur filter to soften it up.
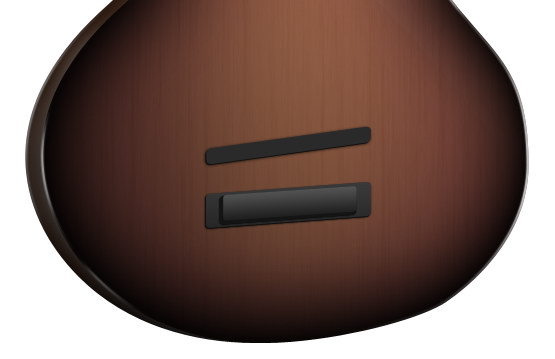
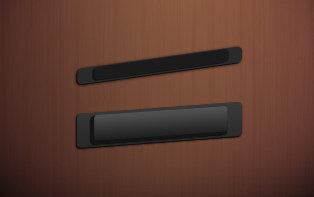
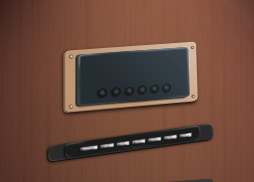
Step 15: Draw the Treble Pickup
An electric guitar will usually have several pickups. Pickups are the receivers of the string vibrations (that happen when the guitar strings are strummed by the guitarist). The pickup located closest to the bridge of the guitar is usually the treble pickup.
We can create this pickup using the same process we used with the bridge and saddle; the only difference is the shape.

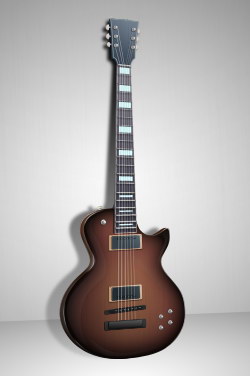
Here’s where we are now:
Draw a smaller rounded rectangle on top of the pickup. Okay, you know the drill by now: Duplicate it, nudge it 2px down and 2px left, and then add a shadow using the Gaussian Blur filter.
Let’s add a highlight on the pickup. Load a selection around the pickup. Create a new layer. Go to Edit > Stroke to stroke the selection — use white for the stroke color and Inside for the location of the stroke.
Add a layer mask and paint away some sections of the white stroke with black.
Give the bigger rounded rectangle a highlight using the same process.

On top of the rounded rectangle, draw a long rectangle then skew it using the Edit > Transform > Skew command. Switch to the Rectangle Tool and, in the Options Bar, choose the Subtract from shape area (-) option. Draw narrow rectangles until you have six of them (because a guitar has six strings).

Give the layer an Inner Glow and Bevel and Emboss layer style.
Inner Glow

Bevel and Emboss
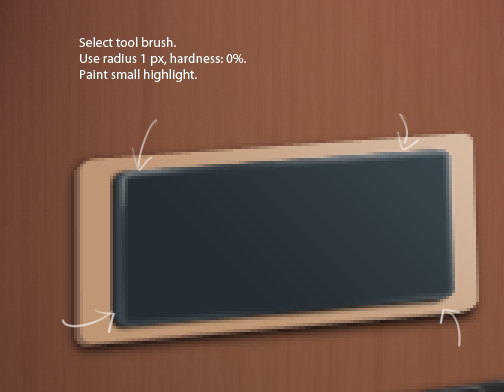
Create a new layer and then use the Brush Tool to paint small highlights on top of each rectangle. These highlights are very small; you’ll need to zoom in for accuracy and use a brush master diameter of 1px.

Here’s our pickup at 100% view. You can see that many small details add up to great results.
Step 16: Create the Middle Pickup
Create a bigger rounded rectangle and make transformations on it until you get a shape similar to what’s shown below.
Give this layer a Gradient Overlay layer effect.
Use the same technique that we used on the bridge and treble pickup to give the middle pickup a 3D appearance: Duplicate the shape, place it behind the original shape, nudge it 2px to the left and 2px down. Change the color of the shape beneath to a darker color.

To add a shadow, first, load a selection around the shape. Create a new layer under the shape, fill it with black, and then soften it up with the Gaussian Blur filter.

Repeat the same process we’ve used several times to create a dark rounded rectangle on top of it.
Let’s give it a stroke highlight (similar to what we’ve already done before). We can use the Stroke command or, for better results, we can use a small brush with a master diameter of 1px and Hardness at 0% to manually paint the white highlights on the edge.
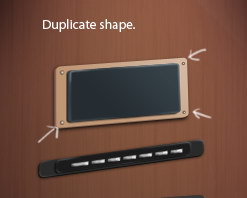
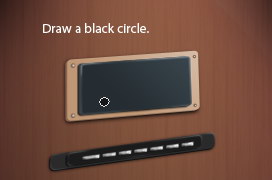
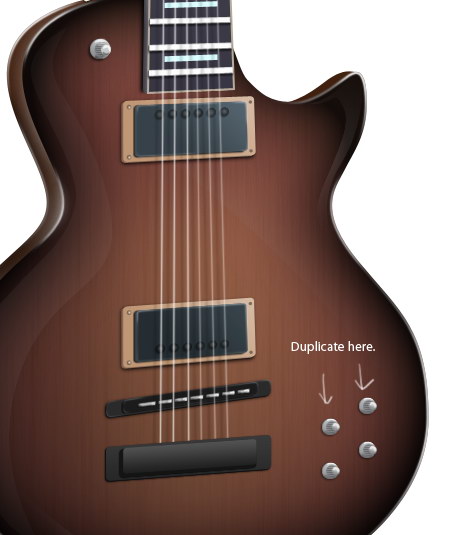
Let’s hold down the middle pickup with some screws. Draw a small circle shape located at the top left corner.

Give the circle a Gradient Overlay (set the gradient style to Radial).
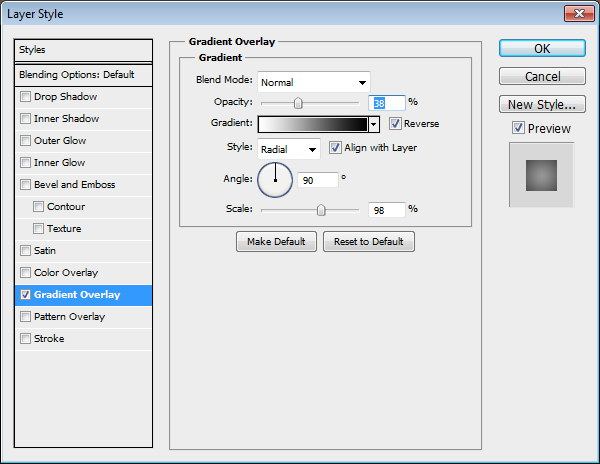
As you can see, the radial color gradient converts the flat circle into a ball that looks like a screw’s head.
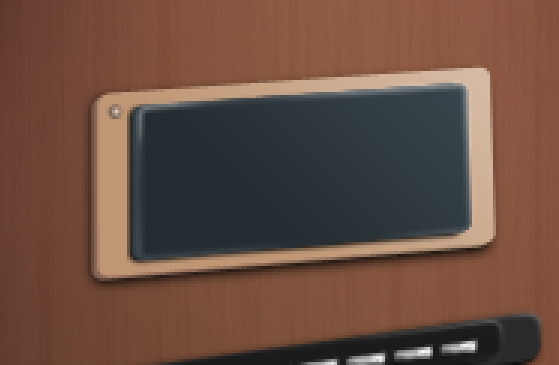
Duplicate the screw and place it on each corner. Keep in mind basic perspective and viewpoint principles: The farther something is from the viewer, the smaller it should be. Thus, the two screws on the right side should be smaller than the ones on the left. You can modify the sizes using the Free Transform command.
Electric guitar pickups will have these fixed pole pieces to pick up the sound of each guitar string. We’ll need to draw six black circles on top of the pickup to represent these poles. Draw just one for now, and then we’ll duplicate it later to complete the set.
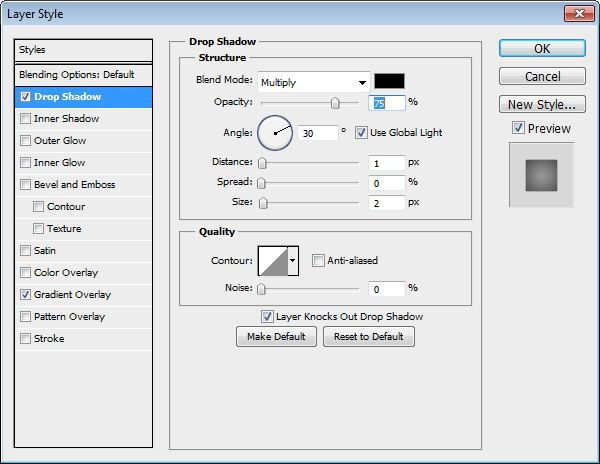
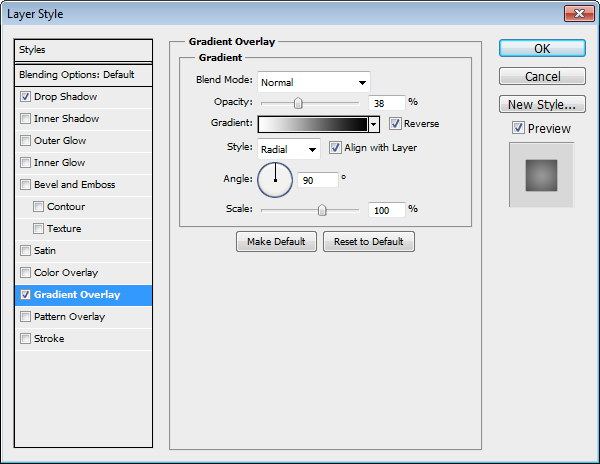
Give the black circle a Drop Shadow and Gradient Overlay.
Drop Shadow
Gradient Overlay
Duplicate the circle five times and position them accordingly.
Here’s our finished middle pickup:
Step 17: Create the Bass Pickup
The topmost pickup is more sensitive to bass sounds, and is closest to the neck of the guitar. Let’s draw this last pickup.
Use the same technique we used for the middle pickup to create the bass pickup, positioning it right under the guitar’s neck.

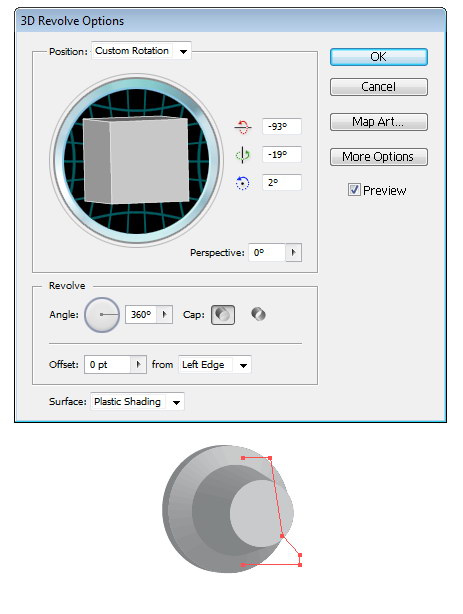
Step 18: Draw the Machine Heads/Tuners
On the headstock are six machine heads that can be turned to adjust the tune of the strings. Let’s create these machine heads. We will use Adobe Illustrator to help us here, so fire up that software if you haven’t already.
In Illustrator, draw the shape shown below using the Pen Tool. Set the Fill color to None and Stroke color to a gray color.

Next, go to Effect > 3D > Revolve. It might take a while until we can find just the right settings for this 3D rendering.
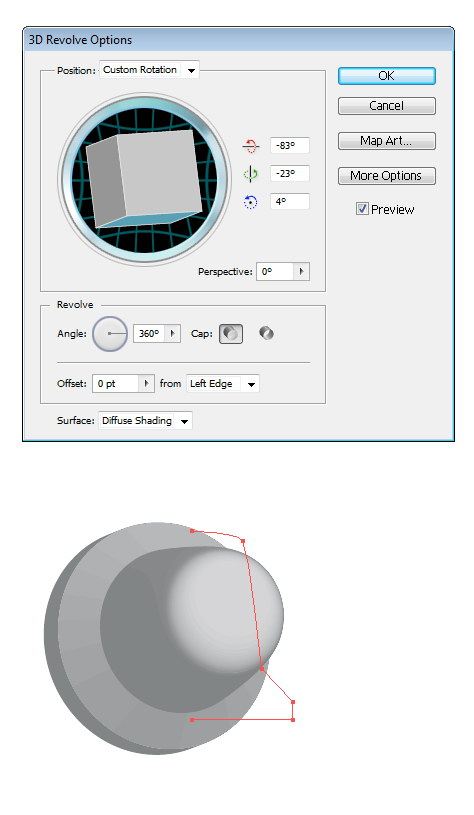
After you’re happy with the 3D rendering, select the object and copy it to the clipboard. Return to Photoshop. Hit Ctrl/Cmd + V to paste the object from your clipboard; when prompted by the Paste dialog window, choose Paste As: Smart Object. By importing the Illustrator object as a smart object in Photoshop, we can retain its vector characteristics and preserve the integrity of the original 3D render.

Place the 3D object on top of the headstock. If, at this point, it doesn’t look right to you, double-click the layer, which will switch you back to Illustrator to allow you to make more edits. Change the perspective settings on 3D Revolve options until you’re satisfied. Save the Illustrator file, then return to Photoshop again and you’ll see that the object will have updated itself automatically.
Switch to the Move Tool (V). Hold Ctrl/Cmd then click-and-drag on the object to duplicate it. Do this repeatedly until you have six of them.

Create a new layer under the objects. On this new layer, brush on some shadows.

The tuning pegs on the side of the headstock are made from three simple shapes. First, we create a rectangle. On top of the rectangle, we create an elliptical shape using the Pen Tool (P). Behind the elliptical shape, we need to draw a similar shape, but with a darker color. Those are the three shapes. Then, we need to create a new layer on top of the shapes for painting on highlights and shadows.
Duplicate the tuning peg until you have three of them on the left side. To make them look realistic, you need to modify some of them to make them appear as though they are in different positions.
Duplicate the three tuning pegs then use Edit > Transform > Flip Vertical. Because of our perspective, place these three tuning pegs behind the headstock layer and scale them down since they are farther away from the viewpoint.
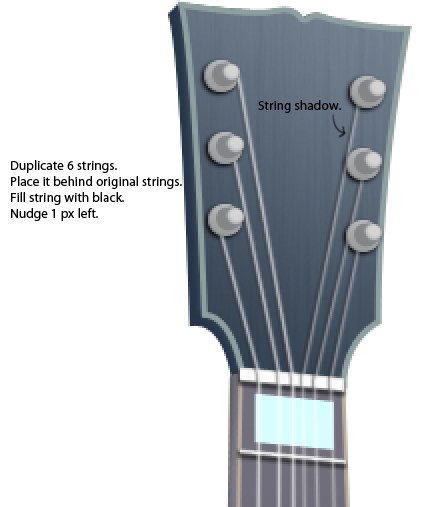
Step 19: Draw the Guitar Strings
Use the Brush Tool (B) to draw six guitar strings. Hold Shift to create a perfect line. I suggest you draw the string using your mouse (not a graphics tablet) to get equal weights on both ends because there’s a big chance that your tablet pressure settings are active. You can deactivate the settings, of course, but it’s just as quick to switch to your mouse and click.
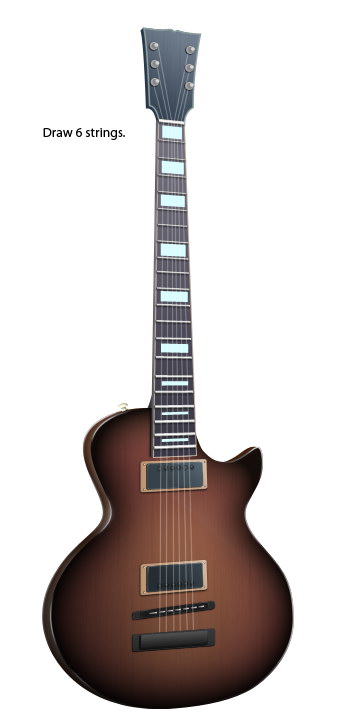
The first three strings on the left should be thicker than the rest. To do that, we just need to duplicate the strings layer by pressing Ctrl/Cmd + J then, on the duplicate layer, delete the other three strings on the right.
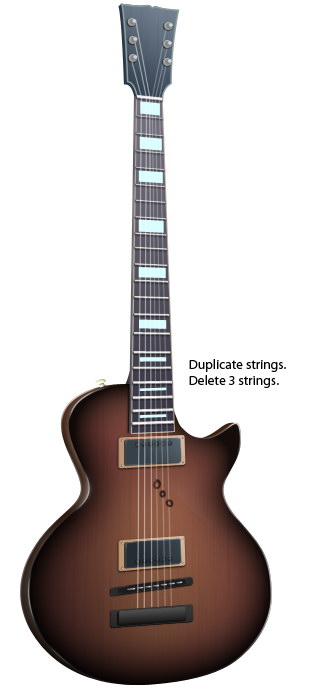
Duplicate the guitar strings layer and change the string’s color to black by setting your Foreground color to black then hitting Shift + Alt/Option + Delete. Nudge it 1px to the left, creating shadows on the strings.
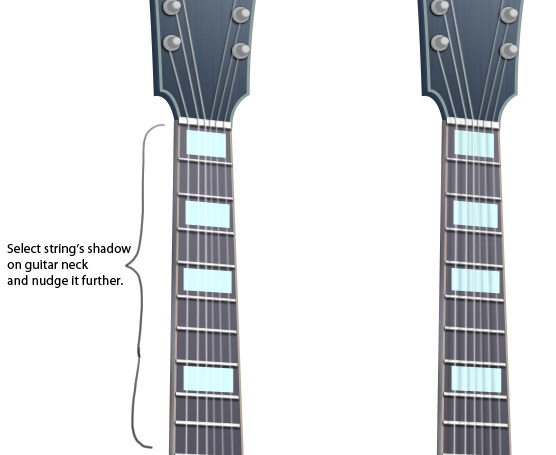
We don’t want the strings’ shadows to be flat. If you have ever seen a real guitar (and I’m sure you have), you may notice that the string’s distance to the guitar neck and body is varied. So, select the strings’ shadows on the guitar neck and body, then nudge it further. You can see the difference before and after nudging, below:
Step 20: Create Volume and Tone Controls
Return to Illustrator and create the following shape.

Go to Effect > 3D > Revolve. Experiment with the settings to find the perfect perspective settings for your guitar.
Paste the control into our Photoshop document as a smart object. Create a new layer underneath it and paint its shadow.
Draw lines on top of the control and then delete parts of it.
Create a new layer for shadows and highlights. You can see the progression of the shadow painting below.
Here’s the control at 100% view:
Duplicate the control several times and place them on the lower right side of the guitar.
Step 21: Working on the Backdrop
We are now done with our guitar. Next, let’s create a good, complementary background for it.
To start, on a new layer, create a soft radial gradient that goes from white at the center to gray.

Create a new layer and fill it with white. Go to Filter > Render >Fibers.
Reduce the layer’s Opacity to 10%.
I think the top part of the background is too light, washing away the details on the neck that we’ve put so much effort into. Let’s fix that. Create a new layer and paint the top part of the background with black. Afterwards, reduce the layer’s Opacity to 20-25%.

Step 22: Create the Floor
Use the Polygonal Lasso Tool to make a selection on the lower part of the canvas. Paint some parts of the selection with gray. This is going to be our floor.
Step 23: Creating a Realistic Guitar Shadow
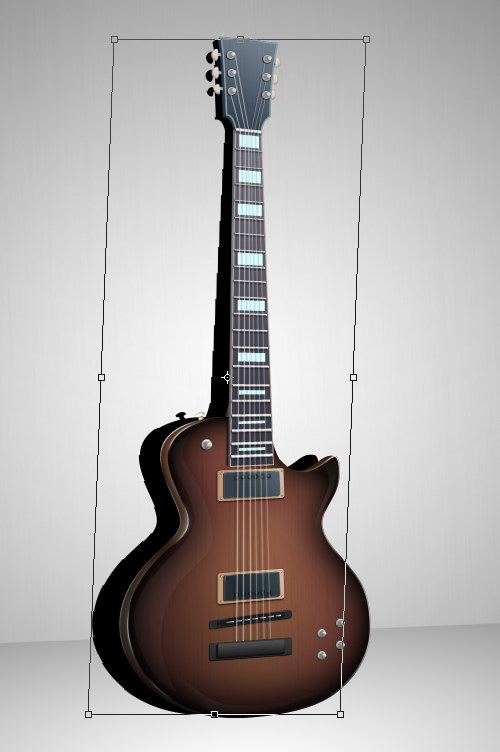
Load a selection around the entire electric guitar. Create a new layer and then fill the selection with black on the new layer. We’re going to use this as a shadow layer.

Press Ctrl/Cmd + T to activate Free Transform. Hold Alt/Option to skew the shadow so that it matches the wall’s perspective behind it, as though the shadow was being casted on it.
Soften the guitar’s shadow using the Gaussian Blur filter.
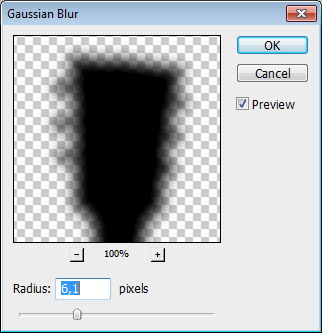
Here’s the result of the shadow:

This shadow is too strong, so let’s reduce the layer’s Opacity to 50-60%.
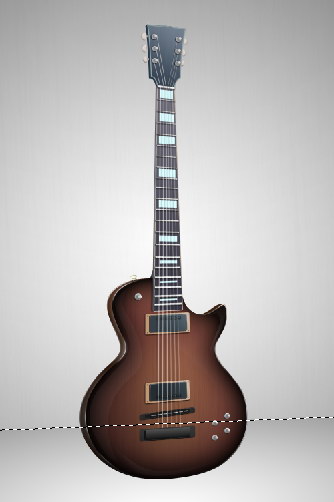
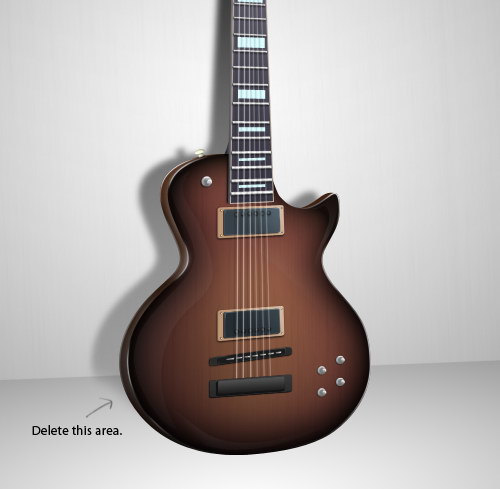
Remove the lower part of the shadow since this part should be hidden behind the guitar.
We need shadows on the floor as well. Create a new layer for it and paint some shadows under the guitar.

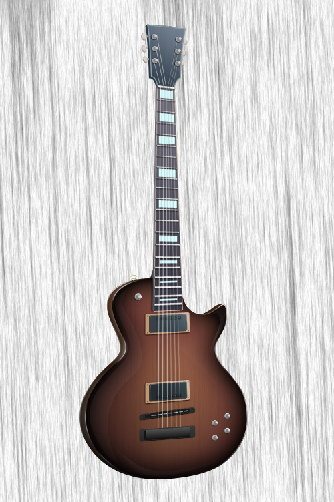
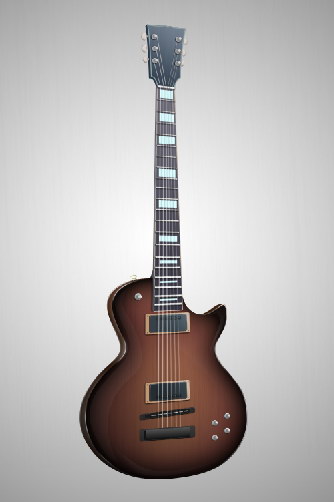
We’re done!
Tutorial Summary
Finally, we are done with the guitar! We covered a lot of Photoshop drawing techniques in this tutorial, keeping in mind that we wanted to produce realistic results. We also used Illustrator’s powerful 3D effects to draw some components of the electric guitar.
I hope you enjoyed this Photoshop tutorial and have picked up some useful tricks and techniques!
Download Source Files:
- electric_guitar (ZIP, 22.4 MB)
http://designinstruct.com/drawing-illustration/how-to-draw-a-classic-electric-guitar-in-photoshop/


0 comments:
Post a Comment